As a system administrator, a developer, or a user, there are times when you must test an operating system or deploy one such that it can be used as an environment for various and/or numerous purposes.
When you find yourself needing to deploy an operating system for such a cause, what do you do? You certainly don’t want to use dedicated hardware for every instance. Instead, you might turn to a virtual machine manager, such as VirtualBox. These applications allow you to easily create virtual machines (VMs), which emulate a computer system such that it behaves exactly as you expect, without the need for dedicated hardware for each of those systems.
With tools like VirtualBox, you can roll out instances of your favorite platform, pause them, stop them, take snapshots of them, and more. You can deploy full-blown desktop and server OSs or even those used for embedded systems. That means just about anyone, from end users to software development companies (such as BairesDev) can make use of such tools.
I want to walk you through the process of creating a Linux virtual machine with VirtualBox. I’ll be demonstrating by deploying a Fedora Desktop guest on a Pop!_OS host. In other words, Virtualbox is installed on the host, which allows the installation of the guest.
The only things you’ll need to make this work are:
Make sure to download the ISO image to your Downloads directory.
The first thing you must do is create the new virtual machine. Open VirtualBox and click New (Figure 1).
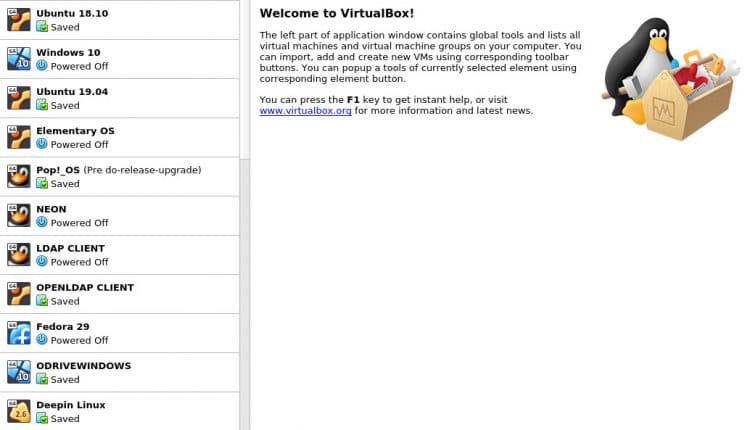
The VirtualBox main window.
In the resulting window (Figure 2), give the new VM a name. After you enter a name, the type and version should automatically populate. If those two options don’t auto-populate, select them manually.
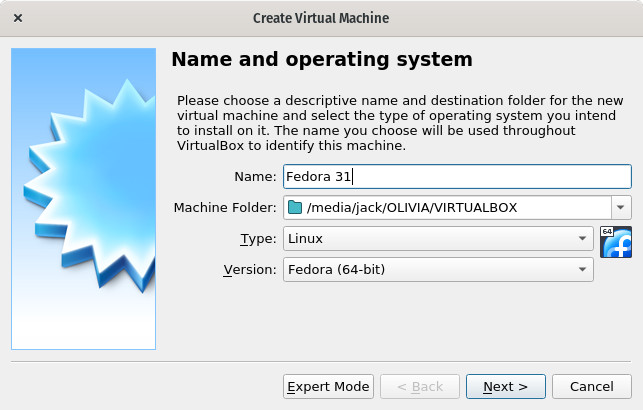
Naming your VM.
Click Next and then allocate a sufficient amount of RAM for the VM in the next window (Figure 3). How much RAM you dedicate will depend on how much RAM your host has and how much RAM the guest needs.
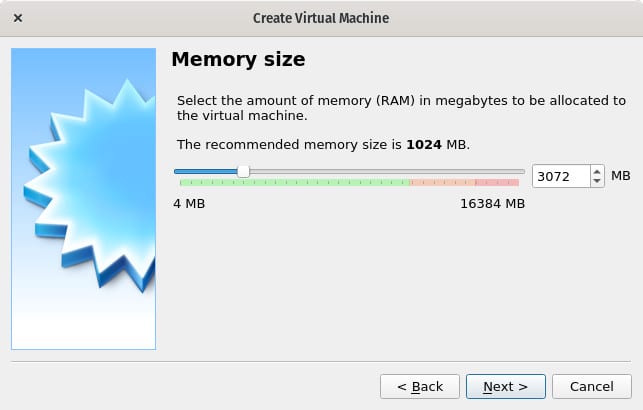
Dedicating RAM to the guest.
Click Next to continue on.
In the resulting window (Figure 4), leave the default (Create a virtual hard disk now) checked.
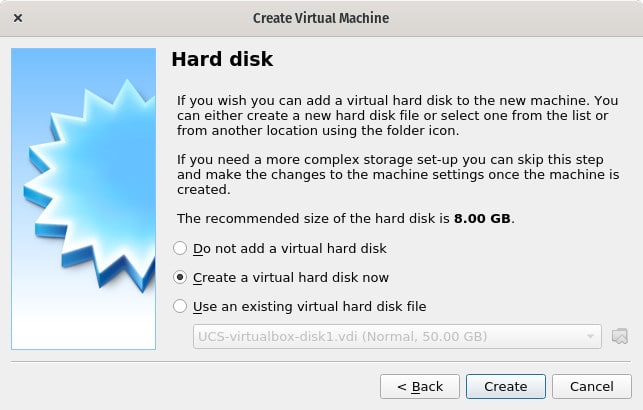
Opting to create a new hard disk for the VM.
Click Create and then (in the new window - Figure 5), leave the default (VDI) checked. This is selected because you won’t be needing to share this new disk with other virtualization software.
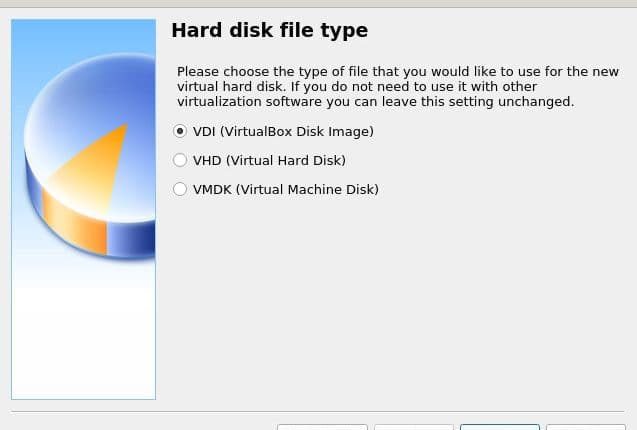
Selecting the type of hard disk to create.
Click Next and then select Dynamically allocated (Figure 6). A dynamically allocated disk will grow as needed, so you’re not immediately taking up a large portion of your local storage.

Saving disk space with dynamic allocation.
Click Next and then configure the size of the disk you want to create (Figure 7). Remember to give this disk enough space for the installation of the operating system and extra room to do whatever it is you have planned for the OS.
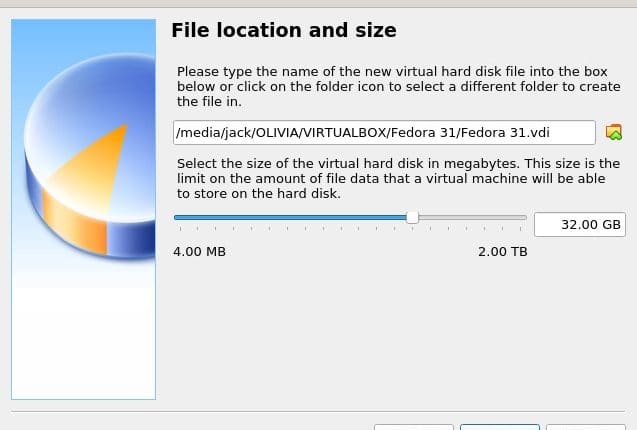
Sizing the hard disk.
Click Create and the hard disk is ready.
At this point, you’ll be taken back to the VirtualBox main window, with the new VM created. However, there’s still much to be done.
Select the newly-created VM in the left sidebar and then click the Settings button above the top-right pane (Figure 8).
Our newly-created VM is ready for configuration.
In the Settings window, there are only a few configurations to make. The first is in the Storage tab. In this section, click the left + button at the top of the middle pane (Figure 9).
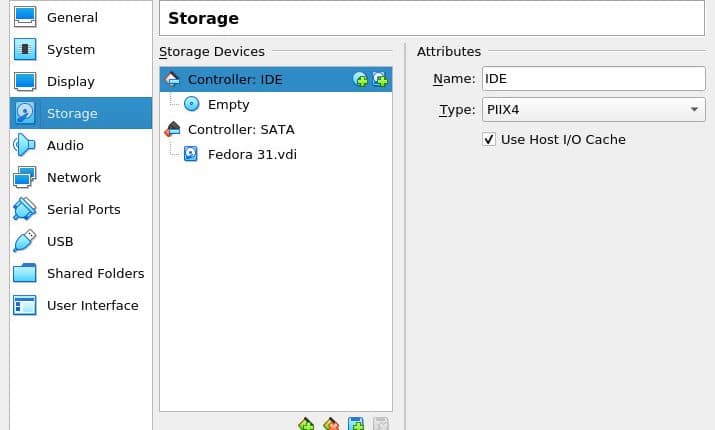
Adding a storage device.
When prompted, click Choose disk to open the Medium manager (Figure 10).

The VirtualBox Media Manager.
Click Add and then locate the ISO you downloaded for your Linux distribution. Make sure that ISO image is selected in the manager and click Choose.
The next configuration is in the Network tab. In that section, select Bridged from the Attached to drop-down (Figure 11).
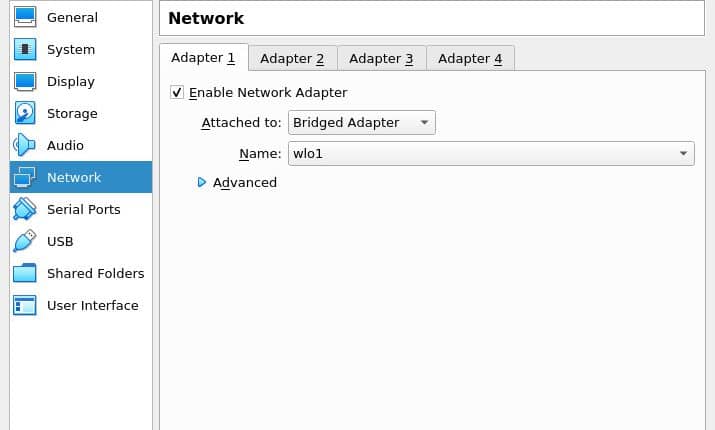
Selecting a bridged network.
A bridged network will make sure your guest operating system is on the same network as the host.
Click OK and your Linux virtual machine is ready to start. Once you start the virtual machine you can then install the operating system according to that distribution’s standard operating procedure.
No matter how you intend on using your virtual machine (be it for everyday usage, network administration, or application development with an outsourced company), VirtualBox makes the deployment of these VMs incredibly simple. Roll out as many virtual machines as your host will allow and use those hosts for whatever purpose you need.